Thursday 24 December 2009

Kodak DCS 560 II: Why do I swim in blood?

"Now the world has gone to bed
darkness won't engulf my head
I can see by infrared.
How I hate the night."

So intoned Marvin the Paranoid Android, in Douglas Adams' Life, The Universe and Everything, which was the third Hitch-Hiker's Guide to the Etc novel. It came out in 1982, an odd time for science fiction. The New Wave of the 1960s and 1970s had run out of steam, and the 1983 Hugo Awards for Best Novel were dominated by the old guard; the winner was Isaac Asimov, for the latest in his Foundation series, and the other nominees included Arthur C. Clarke and Robert Heinlein.

And then, the next year, William Gibson - who had not even been born when Clarke, Heinlein, and Asimov had sold their first stories - won the Hugo for Neuromancer, and inadvertently begat all those cyberpunk films where people with names like Johnny Razoredge and Sally Knifeblade did kung-fu kickboxing in abandoned factories full of steam with dripping water and blue lights. Ninjas with mobile phones and Uzis. Sigue Sigue Sputnik. My generation's conception of cool.

But I digress. This blog post isn't going to be about science fiction. Instead, it's going to be about Stereolab, the avant-garde Anglo-French retro electronic lounge pop band from the 1990s. They didn't sell any records, nobody ever talks about them nowadays, and they essentially wasted their time; but some people liked them. Nobody loved them, though. They were not a lovable band. There was never a sense that they needed or wanted support from the audience, or that they cared whether their records sold, or indeed that they cared about anything at all. The unplanned death of second vocalist Mary Hansen in 2002 highlighted the folly of an image based on total perfection and total control. It was all downhill from then on, and the band eventually split in mid 2009. In the next post I will discuss the intertwined destinies of

Kodak's older digital SLRs were notoriously sensitive to infrared, in a bad way. The photographs on this page were taken with a Kodak DCS 560, one of the later models in the series, that I wrote about in the previous post. There's a photo of it here, the very same camera that I held in my strong, powerful hands. Hands that can cradle the head of a new-born baby; hands that can caress a woman's breast; hands that can crush a man's skull. The hands of a man.

Digital sensors are typically very sensitive to infrared, and modern digital SLRs block out infrared with a filter bonded to the front of the sensor. The DCS 560 is an older design, and has two filters; a relatively weak one mounted on the sensor, and a stronger one just behind the lens mount:

This doubles as an anti-aliasing filter, which blurs the image slightly in order to get rid of moire interference patterns in finely-detailed textures such as hair and clothing. The filter can easily be unscrewed and taken out, which has the effect of making the images slightly sharper, with the risk of introducing infrared contamination.

The Nikon-bodied Kodak DCS cameras had a physically different filter design which achieved the same thing, and judging by internet Kodak guru Stan Disbrow the two-megapixel Kodak DCS 520 had a plain infrared filter which didn't blur the image at all.

Whereas the earlier Kodak DCS 460 was almost unusable as a colour camera without significant infrared filtration, the DCS 560 is much more benign; the colours are often a bit too red if the filter is not in place, but they can generally be corrected with software. As a consequence I have taken my filter out and I never use it.
With the filter removed the camera is still usable for visible light photography. The shots of Karolina Karello in the previous post were taken without the filter, and they are mighty fine and so is she. I was curious to see how the camera would cope with infrared photography, so I obtained a few tools. Firstly, an Olympus 24mm f/2.8. This is a fast wide angle lens that is sharp at f/2.8. The DCS 560 does not cope well with longer exposures, and it has a 1.3x focal multiplication factor, so I needed the fastest, widest lens that I could get my hands on. The Canon 24mm f/1.4L or Olympus 21mm f/2 would be better choices, but they are as expensive as a holiday abroad, and I would rather have a holiday abroad.

On the DCS 560 it becomes a 31mm, which is a good all-round focal length. I used a cheap eBay Olympus OM - Canon EOS adapter. It had a focus confirmation chip, which I had to cover up with gaffer tape because it made the software in the DCS 560's EOS-1n body crash after taking a picture.
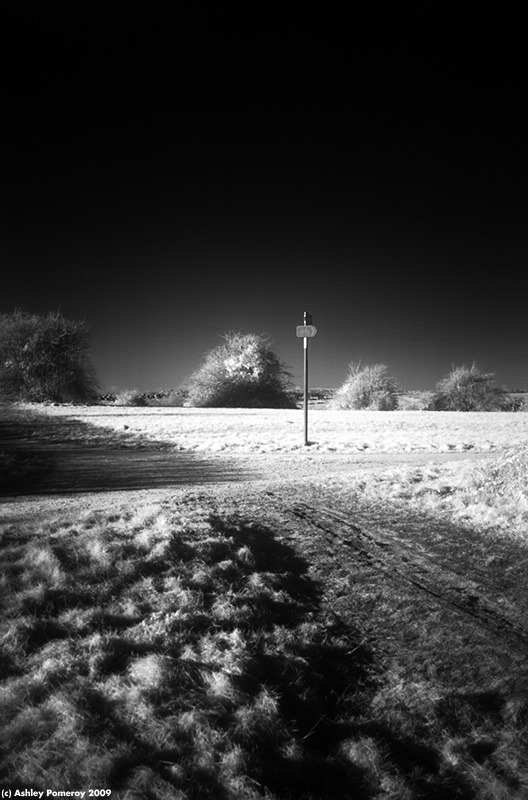
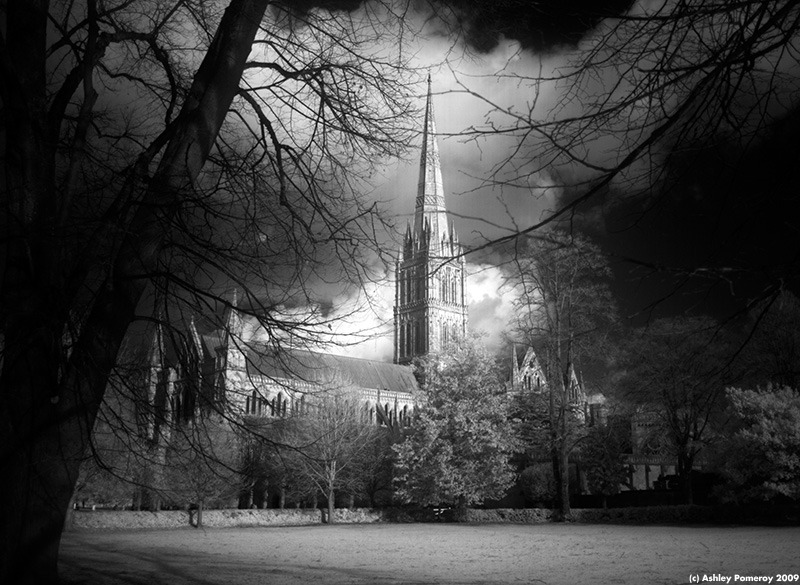
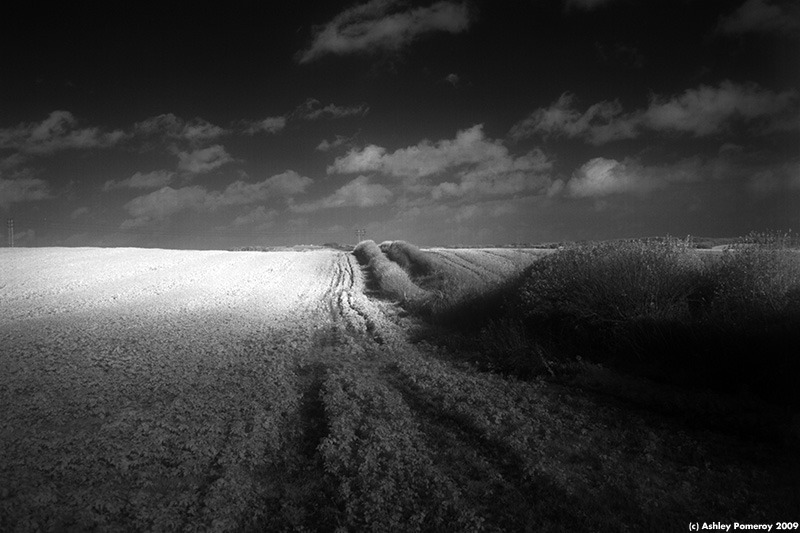
Secondly, I got hold of a Hoya 49mm infrared filter. The filter blocks out visible light, letting only infrared light through. The sun is a very good source of infrared light, but it is also very rare in England in November and December. All of the pictures on this page were taken in bright sunshine; the sky looks black because it does not have any infrared in it, and the grass looks bright white because foliage radiates a lot of infrared. The clouds are very bright because they reflect everything; I assume that the glow which surrounds them is infrared reflected from tiny water droplets that surround the clouds.

The lens has a distance scale, which is very useful, because infrared wavelengths do not focus in the same way as visible light. With visible light, infinity focus on the Olympus lens is at the left edge of the infinity focus mark. I can leave it there and shoot distant things at f/8 without having to bother with the focus ring at all. With infrared light, infinity focus is instead at the 6ft mark, a slight turn counterclockwise. I found this out by trial and error and also by throwing pennies in the air until they landed in a pattern that pleased me.

In practice, with bright sunshine, I could take hand-held shots at f/2.8, 1/15th, ISO 80, moving to ISO 160 if necessary. At higher ISOs the camera is grainier but still captures a lot of detail, although the right edge of the image has a band of amplifier noise. The biggest problem is vertical banding, a consequence of the camera's CCD readout technology. This is most obvious in areas of flat colour, such as the sky, and cannot easily be removed from the image.

As a camera for producing infrared exposures with hand-held shutter speeds, the DCS 560 is surprisingly good, although still vastly inferior to a custom infrared conversion from e.g. LifePixel. It does not capture a strong enough signal to reproduce the vivid colours of a dedicated infrared camera, and for tripod work it makes no sense because exposures longer than a second or so are full of hot pixels and noise. But it's a fascinating novelty nonetheless. And that's what life is all about. Fascinating novelties that distract us from the grim inevitability of death and endless nothingness.

As for infrared photography in general, I suggest you wait until a sunny day that has lots of cloud cover, and then find a spot with greenery, and snap away. The clouds are there to make the sky look interesting. The greenery is there so that people can tell you're capturing infrared. Shoot RAW, and be prepared to boost the contrast like mad.

-

There's one other thing. The images on this page were converted from the original Kodak .TIF files using a piece of software called DCRaw. As Ross "Ask me about Loom" Alford at Nikonweb points out in this thread, digital SLRs tend to capture infrared as if there was no Bayer filter in front of the sensor; the coloured elements in the filter matrix pass infrared equally. DCRaw has an optional switch, -b, that will bypass the demosaicing process, and the end result appears to be an image with about a third more detail than would be produced by a standard RAW translator. The following 100% crop from one of the images above presents the output of DCRaw on the left, with the output from Adobe Camera Raw on the right:

I have applied unsharp mask settings of 50, 0.5, 0 to both images. DCRaw's image is definitely grainier, and I cannot really tell if the relative softness of ACR's output is because of genuinely lower detail, or because ACR automatically applies noise reduction that cannot be turned off. And in practice there isn't really anything in DCRaw's output that I can't also see in ACR's output. A large wash, wax, and dry is more obviously £10, rather than what looks like €74, but that's about it. It would be interesting to compare this output with that from the monochrome-only, Bayer-less DCS 760M, but given that the 760M is a rare and expensive antique, this will have to remain an intellectual exercise.

Nonetheless, the combination of light processing and the lack of an antialiasing filter means the the DCS 560 (and by extension the Nikon-bodied DCS 660 and 760) are capable of producing very sharp images indeed.
Saturday 7 November 2009

Zenitar 16mm f/2.8: Machines Worked by Fire

This is a rewrite of a post from last year about the Zenitar 16mm fisheye lens, and fisheye lenses in general. Since then I have bought a full-frame camera, and I have assembled a mass of images, and the original post was looking a bit old-fashioned. Но́вая метла по-но́вому метёт, as they say in Russia.

"За державу обидно"

The Zenitar 16mm f/2.8 is a fisheye lens from the Russian Federation. It is or was manufactured by KMZ of Krasnogorsk, which is just north-west of Moscow, and as far as I can tell the only way to buy the lens in the UK is via eBay. It typically costs around £130.

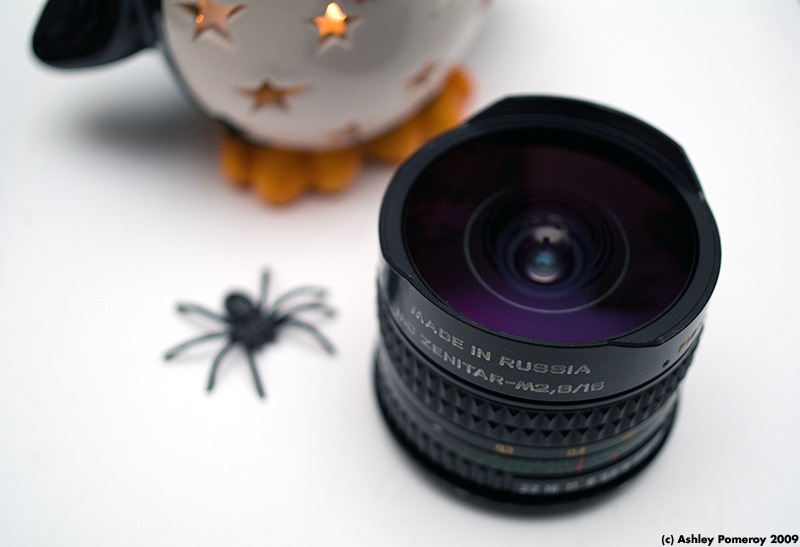
I bought one a year ago, and measured in terms of entertainment versus cost it has been the most entertaining £130 I have ever spent on a single object. KMZ still lists it on their website, although I have the impression that the company made thousands during the Communist era and are just selling off old new stock. Here's what it looks like:

In the picture a giant flaming penguin has sent a little scout - I call her Salotine MacClacky - to inspect the strange metal object that has disturbed the snow-white snow of penguin land. The Zenitar is multi-coated, which is just as well because its unshielded front element would flare like mad otherwise and there is no practical way to mount a lens hood onto a fisheye lens. It still flares when light sources are near the edge of the frame, but it's not an insurmountable problem. Compared to my modern Sigma 15-30mm it is a delight. Here's an example of the Zenitar's handling of lights in the corner of the image:

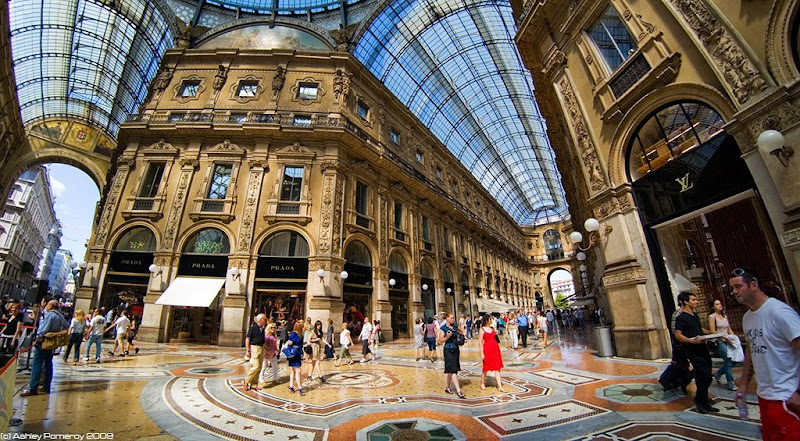
Almost all of the images on this page have been corrected with software so that there is very little perspective distortion. Fisheye lenses were originally developed as a means for astronomers and meteorologists to photograph the entire sky from horizon to horizon. There's a good article about the use of fisheye lenses in an astronomical context here, and this page has an example of a modern device that will automatically photograph the sky during inclement weather conditions. Fisheye lenses were brought into a traditional 35mm photographic context by Nikon, back in the early 1960s, with an 8mm lens that is nowadays a rare and valuable antique. Here's an example of the traditional fisheye look:

Damn that would have been a better picture if I'd pressed the button a few seconds earlier. The lady in the red dress would be closer to the middle of the frame and the stupid-looking Wayne Rooney sunglasses-wearing idiot in the shorts would not exist. Here's some boats:

The look quickly became a cliché of the 1960s psychedelic rock music movement, and a certain kind of modernist photojournalism, and then it died a death, rather like Trevor Horn's orchestra hits in Owner of a Lonely Heart or the stuttering effect in Paul Hardcastle's Nineteen. Modern computing technology and digital imaging have breathed some life back into the fisheye look, because it is now possible to use special secret magic to turn fisheye images into extremely wide panoramas that would be impossible to produce with a single exposure otherwise.

Most modern lens manufacturers make at least one fisheye. Canon sells a 15mm model for just under £600. Nikon's 16mm equivalent is roughly the same price, and I surmise that there is a very small but steady market for such lenses, because some people need the effect for their work. Or perhaps there are some people who have every other lens that the manufacturer makes, and they want to complete their collection. £600 is a lot of money for a toy you will never use, and thankfully there are cheaper options in a variety of focal lengths.

The choice of focal length will depend on your camera. You probably have a full-frame camera, in which case something in the 15-18mm range will fill the viewfinder with scenery, whereas an 8-10mm fisheye will produce a circular image in the centre of the frame, like so. Your wife or daughter might have a small-sensor digital SLR, in which case an 8-10mm fisheye will fill the frame, and a 15-18mm fisheye will produce an image that is moderately wide and moderately distorted and generally unimpressive.

Look at the little people. They are like ants. Ants without a purpose. Who can corral them? A mass of ants, working together, could strip a human city of all organic matter and turn it into a clean concrete tomb. Imagine what human beings could do, if they were of like mind. We could cleanse this earth of organic filth and turn it into a beautiful chrome orb.

I digress. Until a few years ago your choices for cheap fisheye lenses were limited to the 8mm Peleng and the 16mm Zenitar, plus a bunch of fisheye adapters that sit on top of normal lenses. Nowadays a company called Samyang sells a new 8mm fisheye designed specifically for crop-sensor cameras. There are also second-hand fisheye lenses from the 1970s, such as the tiny 16mm Olympus f/3.5 and the 17mm Pentax Takumar f/4. These sell for around £400 depending on condition, although they tend to have been well-kept, because they were esoteric and expensive lenses when new.

At £130 the Zenitar is therefore a bargain, but it has one major problem, which is that the build quality is poor. Or rather, quality control is poor. The lens is made of metal, and my copy feels tough, but it did not leave the factory in a finished state. After I got my lens through the post I had to:
- Unscrew the integral lens hood and rotate it into the correct position and screw it back into place;
- Adjust the focus ring so that the infinity mark coincided with infinity focus;
- Unscrew the front half of the lens and blow out a lot of dust and other particles.

There's a good guide to preparing a Zenitar 16mm for use here. There's a separate guide to adjusting the focus here, and probably more elsewhere. I think it's fair to say that every single factory-fresh Zenitar will require work. In practice all of the above can be accomplished in a few minutes with a small screwdriver and a blower.

The lens ships with some filters that screw into the base of the lens. There are red, green, and yellow filters for black and white photography, and a clear filter which is apparently supposed to be screwed in place when the other filters are not being used. In practice, with my copy of the lens at least, the clear filter is unnecessary, which is a good thing because I have lost it.

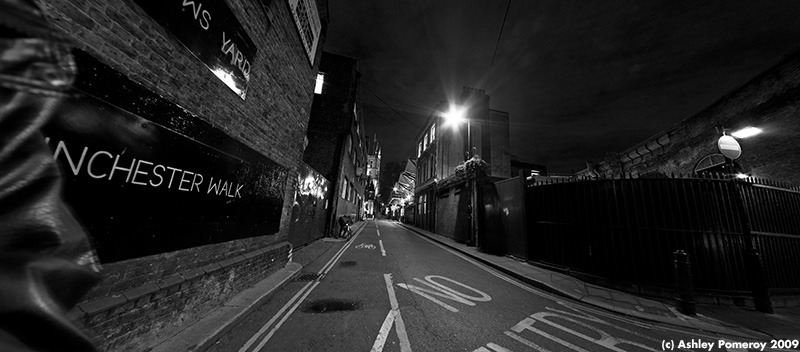
Can you see the strange bendy shape in the extreme left of the image above? That's my jacket. It's surprisingly easy with such a wide field of view to capture parts of yourself - your toes or beer belly at the bottom of the frame, your thumb in the corner, your trousers or arms if you are holding the camera to one side, your horn if you are a unicorn.

A word about mounts. The lens was designed a long time ago, back when the Soviet Union's standard lens mount was the 42mm screw-thread M42 mount, which was used on cameras made by Zenit and Praktica. My lens is in this mount, and I can use it on my Canon cameras with an M42-EOS adapter. The M42 mount is easy to adapt to other cameras, and I understand that Zenitars for the Olympus OM, Contax/Yashica, Pentax, and Sony/Minolta mounts are actually M42 lenses bundled with the appropriate adapter. The lens is also available with a native Nikon F-Mount, because there is no easy way to adapt M42 lenses so that they work properly on a Nikon camera.

It's worth pointing out that the lens is manual everything - manual focus, manual stop-down, with stop-down metering. It's also worth pointing out that when the lens is focused to infinity, and set to f/5.6 and beyond, everything from a couple of meters to the end of the world is in focus, so you just compose and shoot. As a consequence of this the lens is fantastically easy to use, which is for the good because it is hard to compose a fisheye image in such a way that it will look wonderful after being stretched out with software. One problem is that everything appears far away, even if you are standing only a few feet from the action. It is a stand-offish lens that makes people look tiny. You have to get right up close if you want an object to appear in the foreground.

On an optical level the Zenitar is surprisingly good, despite my copy having a lot of dust and other crap inside it. The images are sharp in the centre from f/5.6 onwards and remain sharp to the extreme corners. If it was a "normal" lens it would be an extremely good performer. The only noticeable problem is chromatic aberration, which is pronounced towards the edges of the frame. This can be corrected with software, but not entirely eliminated, and the process of stretching the images tends to emphasise it. There are very few formal tests of fisheye lenses on the internet, but Photozone.de had a look at Canon's 15mm, which seems to be optically very similar to the Zenitar. Perhaps sharpness and chromatic aberration are a general trait of fisheye lenses. The frustrating thing is that Canon's non-fisheye wide and ultra-wide lenses tend to perform poorly in the extreme corners, whereas the fisheye lenses perform very well but are fisheyes. If only Canon could combine the image quality of the latter with the conventional perspective of the former. They would rule the world.

One way to combat the chromatic aberration is to manually paint over the colour fringing with a shade that blends in with the background. As this only has to be done to colour transitions towards the edge of the frame it is not too onerous. A second method is to simply crop off the extreme edges, as in the image of the Natural History Museum just up above. The end result is still very wide, but with more consistent image quality across the frame. This has the second benefit of removing the most distorted parts of the image. Which is a good thing.

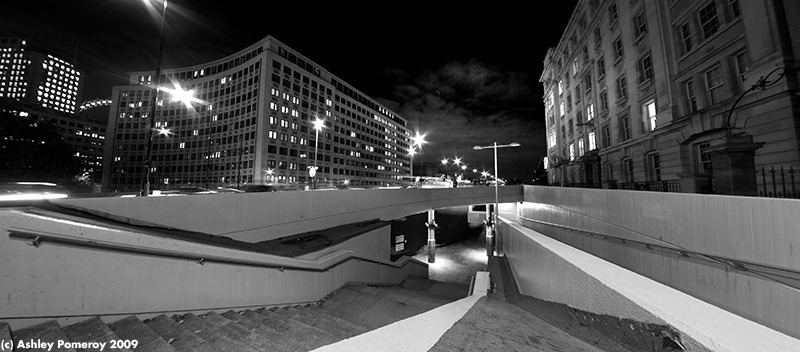
I have generally used the lens hand-held. The following shot was taken in Westminster Tube Station during a very brief moment when there were no people:

Since I wrote the original version of this post there have been two interesting developments that have made using a fisheye lens much easier. The first is that most modern digital SLRs have an electronic spirit level, which is important because it is very hard to keep the horizon exactly level when taking a shot with a fisheye. When the image is stretched out, any errors you make when trying to hold the camera level are magnified. You have to rotate the image so that it is level, and crop the result so that it is rectangular again. This eats away many precious pixels that you could otherwise have put to good use.

Secondly, modern full-frame digital SLRs tend to have higher usable ISO ratings than earlier models. All of the images on this page bar two were shot with a Canon 5D, which had impressive high ISO image quality back in 2005, but is unexceptional today. The indoors images were taken from ISO 400 upwards. The following image was shot at ISO 3200, at 1/10th, and has been put through so much noise reduction that it looks like a cartoon:

Modern full-frame digital SLRs tend to have less of a problem with ISO 3200 and higher, and would give me a bit more flexibility to shoot hand-held in darkness. I could stop the aperture down a little more or take shots at faster shutter speeds. It has to be said that it is easy to shoot with a fisheye lens at low shutter speeds. The old rule of thumb is that the shutter speed should be at least the same as the focal length of the lens, in which case 1/25th is more than enough for a 16mm fisheye.

All of the shots on this page have been run through a piece of software called Panotools. It is a free library of image processing plugins that interface with Photoshop, The GIMP, and other image editors, and it can also be run standalone with a front-end called PTGui. In particular I have used PTRemap, which was designed to stretch out fisheye images in order to create panoramas. Originally the software was limited to 8-bit image processing only, which was a bind especially when trying to recover blown highlights, but modern versions can cope with 16-bit RAW files.

The next three images are examples of how a fisheye image can be stretched out. These were taken with a Canon EOS 50 35mm film camera using Kodachrome 64 slide film:

At the top is the original fisheye image, digitised with a cheap slide duplicator mounted on a Canon 5D. PTRemap allows you to expand the image by a greater or lesser amount. A value of 80° produces the image in the middle, which retains some of the fisheye flavour, whilst a value of 130° produces the image at the bottom, which is almost fully corrected and has an aspect ratio approaching the 2.39:1 of Cinemascope. There are only so many ways to compose an image with such a wide aspect ratio - it is sometimes said that Cinemascope was fine for snakes and people lying down, useless for faces - but then again there are only so many ways to love a woman, or paint a picture, and yet people still love women and people still paint pictures.

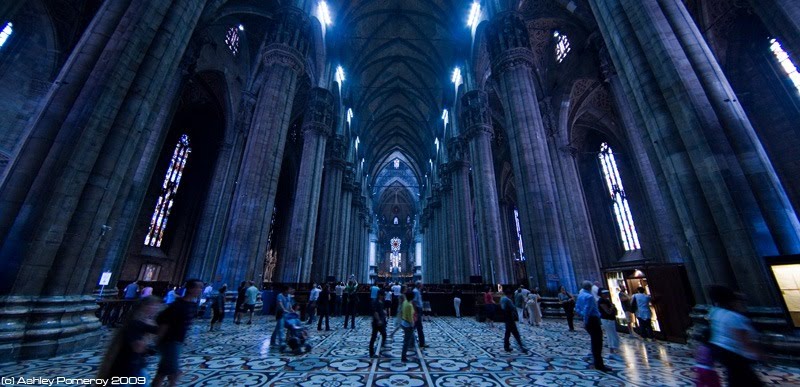
The process of stretching out the image has a negative effect on image sharpness - the central portion of the image tends to remain sharp, but the left and right edges become very blurry. One way to minimise the ugliness is to compose the image so that the edges are dark or indistinct or naturally undetailed areas of flat colour. In the example above the edges are in shadow, and no-one will pay much attention to them. In the example below the giant columns do not have much detail:

As a wide angle lens, the Zenitar is time-consuming and fiddly, but it is much cheaper than the 14mm wideangle lenses that are offered by most of the major manufacturers, or for that matter Sigma's 12-24mm f4.5/5.6, which is the widest lens available for modern digital SLRs. Judging by this extremely handy field-of-view calculator, a 16mm fisheye lens when mounted on a full-frame or 35mm film camera has a horizontal field of view of 137°. which is roughly the same as a conventional 7mm lens, which does not exist. Even if you crop off the edges, you still have a very wide image. It is wider than the popular Horizon panoramic camera, and a lot less fussy to use.
Put another way, for £130 and a bit of know-how you become the widest kid on the block. You can get back at the bastards that belittled and mocked you and disrespected you, because no matter how prominently they tote around their expensive wide angle lenses, you can go wider. And you don't have to mess around with a tripod and panorama stitching software. You can go wider with your bare hands. The women respect that too.

Monday 19 October 2009

Samyang 85mm f/1.4: 25,000 words a second

The make-up-tastic Leanne, shot with a full-frame 5D

"We bring you safety", that's their slogan. Samyang is a small Korean company that has been around in one form or another since 1972. They appear to have specialised in CCTV lenses throughout the 1970s and 1980s and 1990s, but obviously someone in the company has a dream, and over the last year and a bit they have made some noise with an 85mm portrait lens which is the subject of this article, which you are reading right now yes.

A fruit, shot with an APS-C Nikon D1

The company also sells a range of T-mount telephoto and mirror lenses of no great distinction, although they're cheap, plus a fascinating 8mm fisheye lens which gives full-frame coverage on APS-C digital SLRs. They have recently announced a 14mm full-frame manual focus wide angle lens, which is also an interesting prospect, and so kudos to Samyang for being odd (long after writing this post the company launched a full-frame 35mm f/1.4, a classic combination if ever there was one). Most anonymous Far Eastern lens manufacturers that dabble in budget-priced lenses aim at the low-end consumer market, and sell cheap autofocus zooms. An 85mm f/1.4 is therefore an odd, daring choice, aimed at tasteful, intelligent people such as you and I. Here's what it looks like:

It's large and heavy, and it comes with a flimsy plastic lens hood although there's nothing flimsy about the lens itself, which is like a giant glass eye. It has a rubber grip around the stiff, precise manual focus ring, but apart from that the lens is metal and glass. It feels cold. Nothing rattles. It costs roughly £200, far less than any competing 85mm f/1.2 or f/1.4, and still less than any of the various 85mm f/1.8 models. The reason for this is that it's manual everything. You have to focus manually, operate the aperture manually, and if you use the Nikon version on anything but the toppermost Nikon cameras you have to meter manually as well. Although I'm a Canon person I bought the Nikon version, and for most of the shots on this page I mounted it on a Canon 5D with an adapter. This way I can use it on a variety of cameras, and I don't really lose any functionality on a Canon body.

NB I do not own shares in Samyang, and I bought the lens with my own money. If the company wants to send me a Samyang-branded towel I do not mind. I could do with a new towel.

PROTIP: If you buy the Nikon version and mount it on a Canon camera using a Nikon-Canon adapter that has a focus confirmation chip, you get in-viewfinder focus confirmation, whereas if you use the Canon-mount version of the lens on a Canon body you don't. Also, set the focus to the minimum setting and just move your upper body backwards and forwards slightly in order to focus; this is faster and more immediate than using the focus ring (and a good tip in general, not just for this particular lens).

It's a full-frame lens, for full-frame cameras, available in Canon, Sony/Minolta, Nikon, and Pentax mounts. The latter option is odd given that Pentax doesn't sell a full-frame digital camera, but then again perhaps it's aimed at all those people who still shoot their Pentax Spotmatics and K1000s. I can't see into the mind of Samyang. I like to think that there is one enthusiastic man at the company who is a fan of the cult of old manual focus lenses, and he wants to be The Hero of the Antique Manual Focus Lens Men, and this is his chance. I bet he tried to have the lens released in the old M42 screw mount as well, but was overruled.

The lens will work fine on APS-C SLRs, where it becomes roughly a 135mm, which is a classic portrait focal length although I'm not fond of it; too long for general use, not really long enough for spying on people or wildlife etc. I ponder the oddness of a company releasing a budget-priced lens that comes into its own on full-frame cameras, given that full-frame cameras tend to be expensive and sell only to people who do not buy budget-priced lenses. Either Samyang are being very clever (full-frame cameras are more commonplace than they used to be, and they are also more commonplace on the used market), or they're being very silly (in the sense that the big recent news in digital camera land has been the Micro Four-Thirds format, on which a manual focus 85mm would be torture to actually use). Time will tell. Or it may not.

Here's an example of how the lens copes with a full-frame sensor, in terms of vignetting:

The lens has stops for f/1.4, f/2, plus a mysterious unmarked stop, and then f/2.8. At f/1.4 it has mild vignetting as above. At f/2 the vignetting is not noticeable unless you photograph a white wall, and at f/2.8 it has all gone.

There are stops beyond f/2.8 but I have not used them. I didn't buy an f/1.4 portrait lens so that I could shoot it at f/8. Lots of lenses will give you a nice sharp f/8 at 85mm. Almost all mid-range zooms will do that, even the kit zoom you got with your camera. In fact a zoom lens would probably be a better choice if you were shooting at f/8 - especially if you were using studio flash in a dim studio - because the Samyang lens does not automatically stop the aperture down if you have a Canon SLR. The problem is that Canon's lens control is all electronic, and the Samyang lens does not have any electronics or motors in it. The Nikon version will mechanically stop the aperture down when you take a shot, but with Canon you are limited to fully-manual stop-down metering. If you shoot at f/8 you have to either focus at f/1.4 and then quickly stop down to f/8 before you meter and take the shot; or you have to leave it at f/8 and focus through a dim viewfinder, which is just about possible in daylight but not so if you're indoors. In practice I set the lens at f/1.4 and sometimes f/2 and just leave it like that.

The minimum focus distance is a metric metre, which looks like this:

At that distance the depth of field at f/1.4 looks like this:

That is a 100% crop without sharpening. The eye is in focus but the eyebrow is not. The minimum focus distance is on a par with other fast portrait lenses, although it's a shame it wasn't closer; it's no macro lens. Wide open or at f/2.0 it's not razor-sharp in the middle, but otherwise there are no optical problems; no distortion, no CA. The bokeh is very nice. Here's a lot of it, shot at f/1.4 with a Fuji S3 Pro (an APS-C camera - the cropping factor actually makes the lens more useful for small subjects like this):

For portraits, slight softness is fine, I have no problem with it. The combination of narrow depth of field and pleasing background blur is one of the few things that can't easily be mocked up in Photoshop, unless you mess around with masks and layers, and it's strikingly attractive, and for that reason people are prepared to pay lots of money for fast portrait lenses.

Canon's apparently excellent 85mm f/1.2L is the most expensive prime lens they sell that does not have a white barrel; only the fast, long-range telephoto prime lenses are dearer. Judging by this comparison by a Polish gentleman, the Samyang 85mm f/1.4 delivers most of the art that Canon's lens will deliver, but for one-ninth the money. However, judging by this review at Lenstip.com, and comparing it with this review of the 85mm f/1.2 at the same site - which was conducted with a different camera, although they were both full-frame and had similar resolution - it does not deliver nearly the same science. At f/1.4 it makes a brave stab at emulating the Canon lens at f/1.2, but when stopped down it slowly improves to an unexceptional level whereas the Canon lens becomes very sharp.

That image was shot with the S3 Pro again. Sadly I can't find a site that compares the Samyang lens with the Canon 85mm f/1.8, which is a more apt opponent. It's one of Canon's most well-liked lenses, one of the few that people seem to enjoy paying for, rather than grumbling about the price. It would also be interesting to compare it with the Jupiter 9 85mm f/2.0 I used to own; I sold it a while back, and from what I recall the bokeh was lovely from the 15-blade aperture, but it was never sharp.

There are fewer used vintage 85mm portrait lenses than you might expect. It seems that the photographic fashion back in the 1970s was for 135mm lenses, perhaps because they were easy to make. Used Pentax Takumar 85mm f/1.8 lenses tend to sell for more than more than a brand-new Canon 85mm. In general, anything with Takumar on it tends to sell for an inflated price because of blogs very much like this one letting the cat out of the bag. The irony is that my own Takumar lenses are too bashed-about from constant use to be worth anything on eBay. Whatever hype I have helped to generate for them was wasted on me.

In my previous lens test I enlisted the help of Kraftwerk, because the lens was German. Today I shall enlist the help of the Pet Shop Boys, whose poignant programmed plastic pop successfully bridged the gap between the brain, the heart, and the toes in the late 1980s. The following images present crops from a full-frame image shot with a Canon 5D. On the left, the centre of the frame. On the right, the bottom-left corner. The targets are the inner and outer sleeves of the Pet Shop Boys' debut album, Please, with the craggy face of motionless keyboardist Chris Lowe as the eye of the storm. I understand that the fashion nowadays is to call them "Pet Shop Boys" without the "the", but that is not how I do things.

f/1.4

f/2.8

f/5.6

Please came out in 1986, at a time when sampled orchestra stabs and parkas were very fashionable.

It's not immediately apparent unless you compare the full-sized images side-by-side, but the lens starts off decently but not spectacularly sharp in the centre at f/1.4, which doesn't improve a lot when you stop down; in the corners it improves from f/1.4 to f/5.6. Compared to the Porst 55mm f/1.2 that I covered in much less depth beforehand, it has much less colour fringing and distortion, indeed it does not appear to have any. This is good, because softness can be easily improved with post-capture sharpening and by sizing the image down, whereas colour fringing and distortion take a bit more work.

So there. The box contains an instruction manual, a soft bag, front and rear lens caps, and a bayonet-mount lens hood that leaves the 72mm filter thread free. The hood is plastic, but at least Samyang gives you one, unlike mean old Canon. The hood reverses over the lens. The lens itself appears to be multi-coated (it is a deep golden yellow green colour, and large enough for the model to use it as a mirror).

The lens is made by Samyang, and I assume it was designed by Samyang too. It is sold under a multitude of brand names, including Opteka, Bower, Rokinon, Polar, Falcon, Walimex and Vivitar. The Opteka and Rokinon names appear to be more common in the US. Mine is from Samyang in Poland and has a Samyang nameplate. As far as I know, the nameplate is the only difference between the different lens brandings. In the past, the Champion of OEM Rebranding King was Cosina; a challenger appears.